Powered by Blogger.
Showing posts with label cool manicure ideas. Show all posts

Glitter Gradient Nails

Friday, January 21, 2011

These nails were extremely easy to make, so much that I almost feel bad posting about them! But I love how they turned out SO much, I think they are super cute!
There are several ways to achieve the gradient effect, and I think that the most popular one is the sponge method, in which you paint your nail using a sponge instead of a brush. But I didn't do that! For this look, I used 3 coats of my glitter nail polish just in the tip of the nails, and then one coat that started right at the half of the nail.  I left the rest natural, because I wanted my glittery tips to be the center of attention.

I used Icing - Sparkle me happy and finished it off with 2 coats of Seche Vite to smooth it out and to add a gloss effect.

Fluorescent light
Natural light

Read more...

Sophy Robson inspired nails: Dripping tips

Wednesday, January 12, 2011


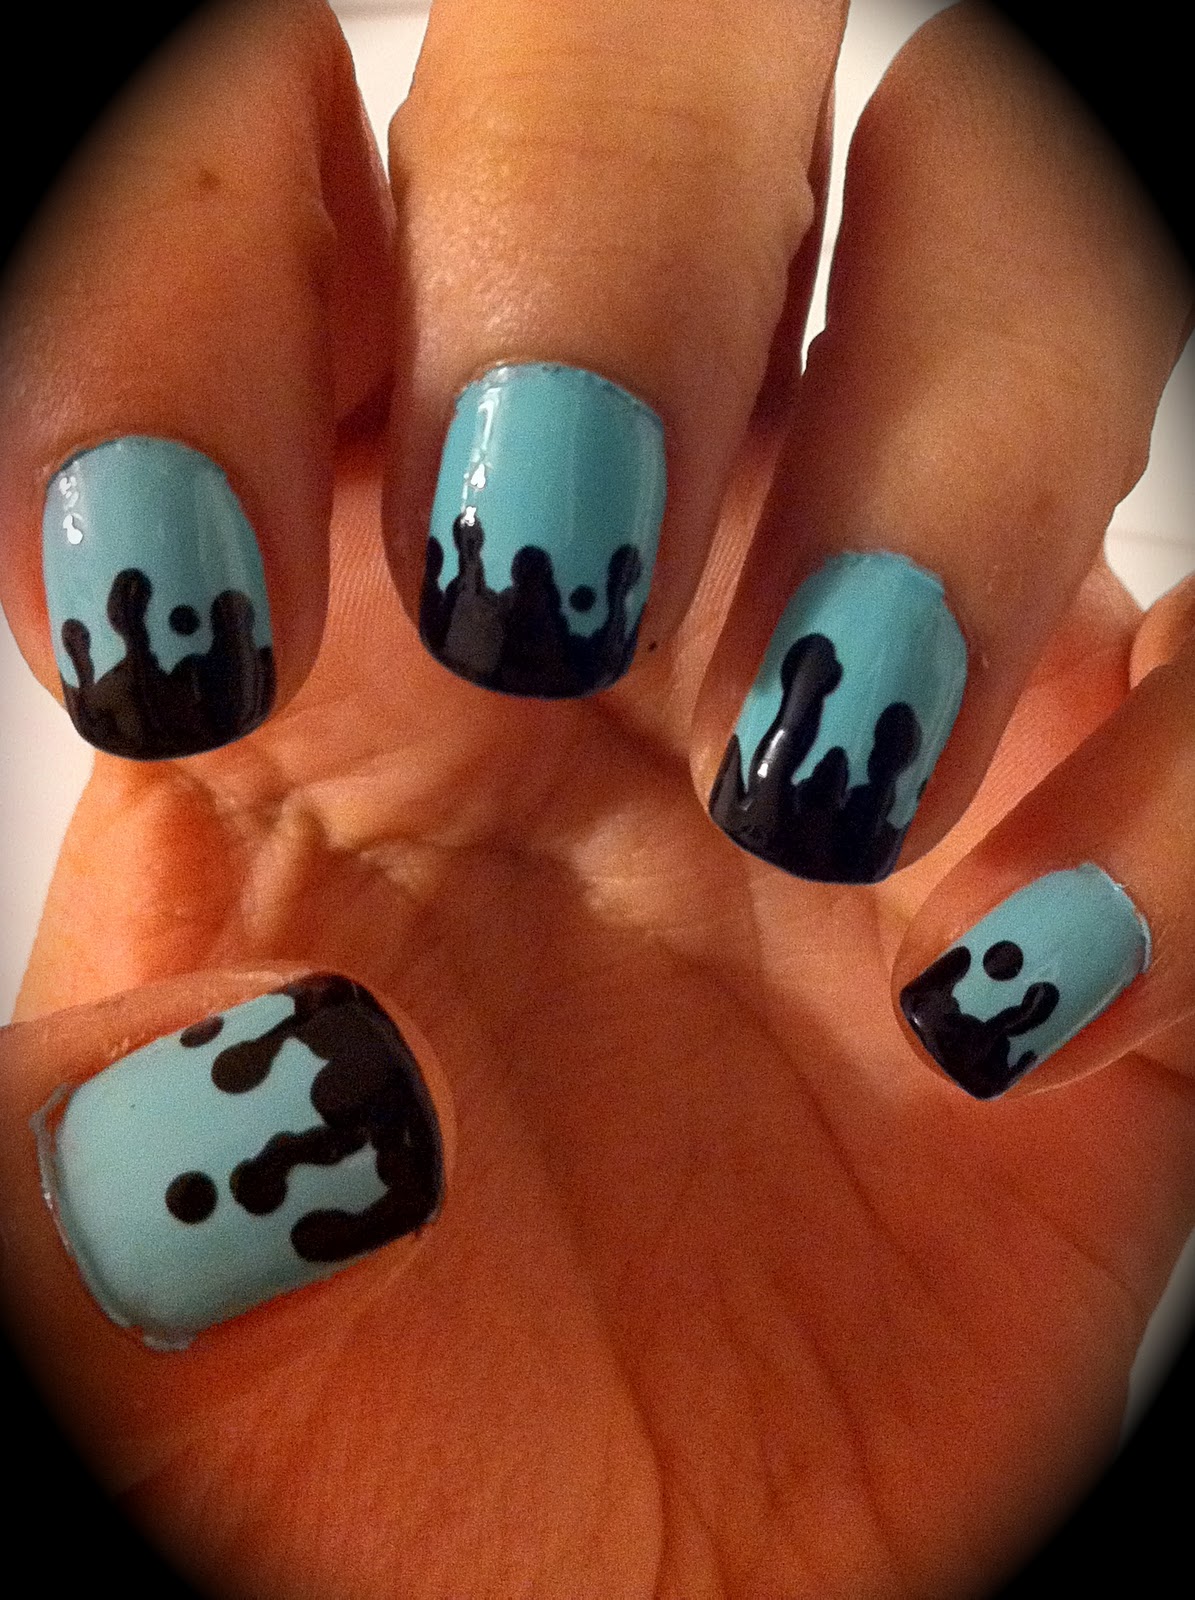
Lately I've been totally obsessed with Sophy Robson's blog.  Robson is the "Nail Queen" of London, and her designs are just amazing.  She's known for doing the nails for a lot of designers on fashion week runways and a whole bunch of Vogue covers as well.  She is a trendsetter, and an inspiration.  You can check out her blog HERE.

This look is inspired by one of her designs, the "blood dripping" nails.  I used China Glaze's For Audry, and Finger Paints' Black Expressionism for the tips.  I used my dotter tool for the dripping and I just started drawing random patterns, and a dot here and there.  With the same dotter tool, I finished off the whole tip.  I thought about using the polishes' own brush, but I decided on the dotter tool because I thought I'd give the tips more dimension, and I was right.
I waited for it to dry a little bit before applying my top coat because I didn't want my colors to run or mix.

This is the final product, I hope you like it. 

Read more...

Nail Fraud: Disco

Thursday, January 6, 2011

I have another Nail Fraud post, and this will be my last one, because i'm out of decals, but I think I saved the best for last.  I have to say that this is my favorite print from the 3 sets that I got.  The design looks amazing, but I do have one big fat complaint, though.  This set was very different from the others.  The other decal's presentation was very similar to the Incoco appliques, they have a protective film on top, and they apply better, they kind of bend to match the shape of your nail.  But this ones really just look and feel like plane ol' stickers! They do not have a protective film and they are very hard to match the shape and curves of the nail, they feel kind of stiff on the nail. Also, they didn't came inside a sealed package.  On the other appliques, if you are left with wrinkles on them, they often disappear the next day (I think heat helps with this), but not with Disco.  I applied them yesterday and I still have stiff wrinkles towards the free end of my nails (and I don't think they are disappearing any time soon!).  Also, the print seems very fragile, like any little scratch is going to damage it, so I applied a thick coat of a glossy top coat over it.  In the end, the result looks pretty cool, because this design is amazing and colorful, so I am happy with how my nails ended up.  See for yourself. Click on the pics to make them bigger.

Hold decal with thumb and index, apply close to the cuticles. If you mess up, gently remove the decal and reapply

File off excess with nail file (Nail fraud includes this cool nail file!)

Final result! See the gloss? I used OPI's top coat

This is NF's Goldfinger sealed package, with a holding strip and protective film over decals

This is how Disco looks in the package, very different! It lacks all those cool extras that the other designs have!

Read more...

The Christmas Season has officially begun!

Friday, December 3, 2010


Christmas spirit took over the minute I laid eyes on China Glaze's Party Hearty. What a GORGEOUS glitter!  I really didn't wanna mess with it, since it is so adorable and almost overwhelming.

Read more »

Read more...

What's new in my stash

Hey there! I just wanted to share the polishes that I've bought lately and haven't used yet. 

Konad Special Polishes in Green and Dark Purple.
They are much darker IRL
OPI in Tease-y does it and Simmer & Shimmer,
from their new Burlesque collection

SH Xtreme Wear in Red Carpet and Emerald City. SH nail art pen in White.
I wish you could see the tiny glitter on RC, it's beautiful!
Icing- Sparkle me Happy, Icing-Bedazzled, Unnamed Orange Glitter from Hot Topic,
CG Boundless Color - Amethyst Mist and NYC In a New York Color Minute - East Village 

I saved the best for last… China Glaze - Party Hearty from their Holiday 2010 collection

I would love to hear about your recent buys or favorite picks.

Read more...

A sea of purple

Saturday, November 27, 2010


This look was a little bit more complicated than what I usualy do but I will explain it step by step.
I used Sally Hansen's Deep Purple from their Xtreme Wear collection as a base.  Like most of their polishes, it was very easy to apply, smooth, and opaque in 2 coats.
We are going to apply a tape diagonally to each finger and then use our base color to paint the nail.


Then, we are going to stamp our nail with a swirly design from image plate bm19 and a Silver Foil Nail Polish (Finger Paints Easel come, easel go).  Remove the tape carefully and slowly to protect your design.
Apply silver glitter to the line that divides your design and your naked nail with a fine brush.  I used Kiss Nail Art Paint in Silver Glitter.  If you are shaky like me, you need to do this slowly so you can get a straight line.  Finish it with a nice and glossy top coat, like Seche Vite.

After removing the tape
Apply a thin line of silver glitter and voila! 


Nail Polishes that I used from start to finish!

Read more...

  © Blogger templates Newspaper by Ourblogtemplates.com 2008

Back to TOP